SIMPLE SCRAP FRAME
I have been received this notes since my birtday last year. but i just safed it in the glass jar. so i want to make it as a gift for my self in this new year and i always remember it. remember what all of my best friend want me to be.
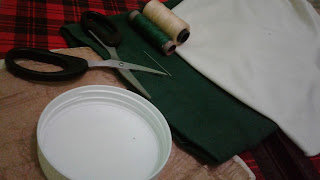
Materials ; a carton paper, a plastic wrap, a photo sticker and a fabric
Step 1
Make a frame
i am recycle a calendar paper unused as carton paper heheh,,,
make 4 lines to make a frame bar
fold it to turn it into a bar
like this
make a mark
and draw it like this
when you cut it, it will turn like this
so you can make a frame
like this one
Step 2
Make a background frame
i choose fabric with light blue colour
layering a fabric with cardboard unused so it turn like this
Step 3
Completing the scrap frame
make some word on the photo sticker
layering the frame with plastic wrap
and
walaaah


![[DIY] PURSE LEMON STAMP](https://blogger.googleusercontent.com/img/b/R29vZ2xl/AVvXsEi81Zm9Pah2AQW1Ho_Nisn_V723H0Vckpfr9WWGwltSNLYmlOotQq5gjNYQ1A5S_Pnrd5ljgbIEnRalTfFcF7_t6mVQTpQvH66IWfovTLdout_yQTzfDsRPakqBaKEtKcW00k8qp6IM10Zx/s72-c/20180320_103357.jpg)
![[DOLL HOUSE] MAKE YOUR OWN SOFA](https://blogger.googleusercontent.com/img/b/R29vZ2xl/AVvXsEhSetoFThiCeyhDtE8_Jbp1-eqGH4rl81SpuO9-Kn1ULTMF9S4WA37h5_T9Cl5XQfrlx2e6AlEsSyB02f_oPB8YlGISxuDTLJfyDoskdBQIYlkXyd9YL3URKI0C8b2ABbSPs9P0lTb57OZ6/s72-c/20180322_144910.jpg)
![[TERARIUM] RECYCLE COBEK](https://blogger.googleusercontent.com/img/b/R29vZ2xl/AVvXsEiFNhM2-_ZUP4LpmsdL65tTneI2kC16VZei8snT9aRBlOJ9eI5xMOsOQ8wlJIJkbIfEkSCghGDDEajO01q_RQI0oLAdioiO_5WPW_pAzjzoNz1BPRL2SO1ypdyvijh68_7nhI0E4DWi2g43/s72-c/2018-03-14+20.43.58.jpg)
![[BOOK MARK] BEAUTIFUL HERBARIUM BOOK MARK](https://blogger.googleusercontent.com/img/b/R29vZ2xl/AVvXsEhr7vhj8pJ6BOAqCF8yo7h9hzySWsWYNiwE-404o1XD22Q_CNYm1-PWZJZdSE3bpkWAFnraqUOH80zYT-EuVm0Xzu81KgJETepRPXo5spiRgqxcvPUHTTyrjV81avBWWGz4xU4uIjQxmTF1/s72-c/2.bmp)
![[PAPER ART] BOOK COVER](https://blogger.googleusercontent.com/img/b/R29vZ2xl/AVvXsEj_PZQbVRJBEaucXQ_T0NC47dubsCGTaVJ5TavDEZ5z18NPL1v2Zj0qoaLvJl1KCvQEjEc1y1DJz6urA8DNxxgIdP9gO8ln4C96koGmHBXFHtp72rLFsPRVrXi08Sv0Jg0CL6683_wsEG4J/s72-c/C360_2017-11-25-18-09-54-166.jpg)

![[QUOTES] BEAUTIFUL QUOTES FOR YOUR BEAUTIFUL ROOM](https://blogger.googleusercontent.com/img/b/R29vZ2xl/AVvXsEgaOotodl2-ELlVEgInCMYGU_gpzvjIngpuNEgDUEbs0GCgK1jt_k2MBrTgmtO4RYvV1Q_npnl0Bp7vD-kBsOVBOnOmvk0NHaVZ9mzvJCRTA8F0ea-8DyuJv5XfTzyOydwEDjDAS4huDHgj/s72-c/C360_2017-11-03-15-03-07-008.jpg)
![[GIFT] CUTE GIFT BOX](https://blogger.googleusercontent.com/img/b/R29vZ2xl/AVvXsEi8Gx5rcXSFEnB_Sspie7HnVdgUwTd0ciEj7FzgnS4MMDgl8XPfq7jVG0ojtms5_HaS5aBXCwqRnsqFgKspQBBFst2aOKTey4fRcXkJqxOjI6a82q2UuhvLurk3XMxW5ZC_nC4S8thzRTwV/s72-c/WaterMark_2017-11-12-17-16-10.jpg)
![[KEY CHAIN] MOUSE AS YOUR KEYCHAIN DOLL](https://blogger.googleusercontent.com/img/b/R29vZ2xl/AVvXsEjKyPuPXWG8vuimUgq3h8ga6iqrvllbTIsCzXUfPRih1HqVHaXXXFKaVXFGnuaX1M_zJMYnJsrkAPvvNpdRGgTN21mFlSIF5vJEbpKY9k1_7rJcjSGbXGnyGxaKPdf0uymrkRF8hMQJxpfi/s72-c/20120102_030018.jpg)
![[HAND LETTERING] CANVAS-HAND LETTERING](https://blogger.googleusercontent.com/img/b/R29vZ2xl/AVvXsEiwwMSPfaHxl8mexKm0v-R4SSHZIjBUe6_b0dWegnilOF2TrDWRL466T2kKbhuRhcN1O0qUML3F0WscprjaQgsjM-J6xvl3nTrA5L4C20t4k_XcmXu29VCnIGTTPgjN-WlE3OaNrfZi3_tv/s72-c/WaterMark_2017-11-08-17-09-43.jpg)